DIY Pet Surveillance: Your Affordable Home Monitoring System
For pet owners, having the ability to keep an eye on their furry friends provides peace of mind. Whether you’re at work, out for groceries, or just away on vacation, monitoring your pets can save you from worrying about what they’re up to. So why not build your own home pet surveillance system? This DIY project can be both fun and rewarding, allowing you to create a tailor-made setup at a fraction of the cost of commercial systems.
Understanding the Components
Essential Technology Requirements
Getting started with your pet surveillance system requires a few basic technologies. Here’s what you’ll need:
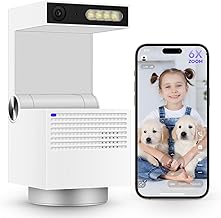
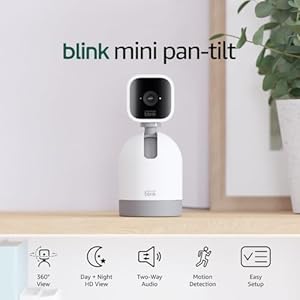
- Cameras: Choose a good quality camera that allows you to see your pet clearly.
- A smartphone or computer: This will be your monitoring device.
- Internet connection: A stable Wi-Fi connection is essential for streaming video feeds.
If you’re feeling adventurous, consider budget-friendly options like a Raspberry Pi or even an old webcam. You’ll find that there’s no shortage of ways to get tech-savvy!
Optional Enhancements
Want to kick things up a notch? Integrate some smart technology into your surveillance system:
- Motion sensors: These can alert you when your pet is moving around.
- Smart lighting: Control the lights to help illuminate your pet’s area.
- Two-way audio devices: Talk to your pets or hear what they’re up to.
Gathering Your Materials
Recommended Tools & Equipment
Here are some specific recommendations for components:
- Wyze Cam: An inexpensive indoor camera with great features. Purchase it here.
- Logitech C920: A reliable webcam option that can be used for surveillance.
- Raspberry Pi: A fantastic choice for those looking to DIY. Get yours here.
Software Solutions
For viewing camera feeds and setup notifications, you need solid software. Open-source solutions like MotionEyeOS are popular among Raspberry Pi enthusiasts, providing a robust yet flexible monitoring experience.
Step-by-Step Instructions
Setting Up the Camera
Start by positioning your camera for optimal viewing. Consider areas your pets frequent the most. Once your camera is in the right spot, connect it to your home Wi-Fi. Remember, the key to a successful pet surveillance system lies in the placement of your cameras.
Connecting to a Monitoring System
Next comes the connection to your smartphone or computer. Download a viewing app, such as Alfred or Manything, and follow the step-by-step instructions to get your cameras linked up.
Configuring Notifications
Set up motion detection to receive real-time notifications. This way, you’ll be alerted any time your pet takes a stroll across the living room.
Troubleshooting Tips
Even the best plans sometimes run into issues. Here are some common problems you might face:
- Connectivity issues: Ensure your internet is stable and that the camera is connected.
- Camera placement: Adjust the angle if you aren’t getting a clear view of your pet.
Enhancing Your System
Integrating Smart Home Devices
Add additional smart devices to your system to make it even more efficient. Devices compatible with virtual assistants like Alexa or Google Assistant can be controlled all in one place. Think about integrating features such as light controls or even treat dispensers!
Exploring Advanced Features
Consider scheduled monitoring or cloud storage for your footage. Storing recordings securely can help keep an eye on your pets, even when you’re not home.
Wrapping It All Up
Creating your own DIY pet surveillance system has multiple advantages. Not only do you save money, but you also gain the customizable experience that’s perfect for your unique pet. Your setup will serve your needs, and with a little creativity, you can make it as complex or simple as you wish.
Now that you have the know-how, why not give it a try? Feel free to share your experiences, improvements or questions in the comments below. Your furry friends will thank you!